Repairing a Leaking Toilet Base
Repairing a Leaking Toilet Base
Repairing a Leaking Toilet Base. This comprehensive guide will address the troublesome issue of a leaking toilet base. Leaks at the base of a toilet can cause inconvenience, potential damage, and even health hazards.
Our focus is to provide a step-by-step guide to diagnose and repair this common problem.
This article will cover the causes of leaks, the diagnostic process, repair steps, necessary tools, safety precautions, and preventive measures to ensure you can confidently tackle this issue.
Read on – Repairing a Leaking Toilet Base:
Understanding the Significance of a Leaking Toilet Base
Water Damage
A leaking toilet base poses a significant risk of water damage to your bathroom floor and subfloor. Over time, the continuous seepage of water can weaken the structural integrity of these surfaces, leading to costly repairs.
Health Concerns
Stagnant water from a leak can create an ideal environment for mold growth. Mold damages your bathroom and poses health hazards, especially for individuals with respiratory issues or allergies.
Increased Water Bills
A leaky toilet can result in higher water bills. Even a slow, imperceptible leak can waste substantial water over time, impacting your monthly expenses.
Causes of a Leaking Toilet Base
Worn Wax Ring
The wax ring is crucial in sealing the connection between the toilet and the drain pipe. Over time, this wax ring can degrade or wear out, leading to leaks.
Loose Bolts
The bolts securing the toilet to the floor may become loose due to regular usage or improper installation. Loose bolts can allow water to seep out from the toilet’s base.
Cracked Toilet Base
Cracks or damage to the porcelain or ceramic base of the toilet can also be a source of leaks. These cracks may develop due to physical stress or aging.
Diagnosing the Leak
Visual Inspection
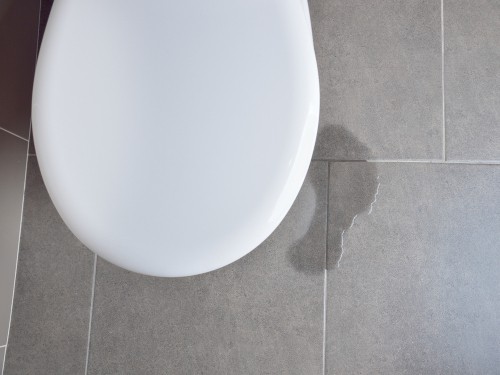
Begin by visually inspecting the base of the toilet and the surrounding area. Look for signs of water accumulation, discoloration, or damage. A thorough examination can often reveal the source of the leak.
Paper Towel Test
Perform the paper towel test to detect subtle leaks that may not be immediately visible. Place dry paper towels around the base of the toilet and check for moisture or wetness after a few hours.
Water Dye Test
To pinpoint the exact source of the leak, you can conduct a water dye test. Add a water-soluble dye to the toilet tank and observe if the colored water appears at the base. This test helps identify whether the wax ring or another component is causing the leak.
Tools and Materials for the Repair
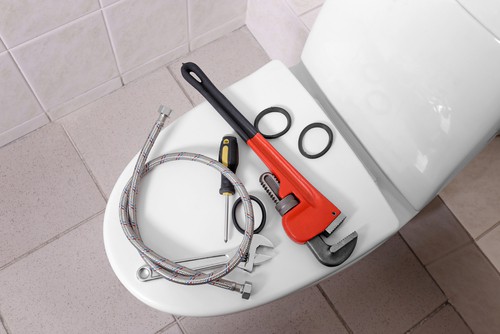
Wax Ring Replacement Kit
For a successful repair, ensure you have a wax ring replacement kit, which typically includes a new wax ring and necessary bolts.
Adjustable Wrench
An adjustable wrench is essential for loosening and tightening bolts during repair. It provides the required torque to secure the toilet properly.
Plumber’s Putty
The plumber’s putty is used for sealing and waterproofing. It helps create a watertight seal between the toilet base and the floor, preventing future leaks.
Safety Precautions
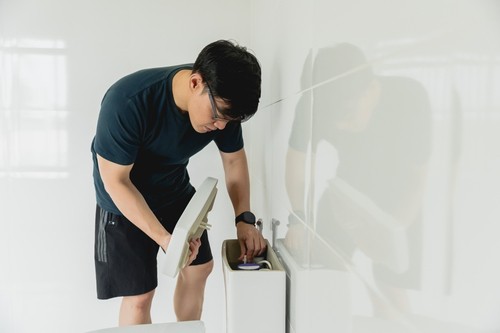
Turning Off the Water Supply
Before starting any repair, shut off the water supply to the toilet. This precaution prevents water from flowing into the tank and bowl during repair.
Protective Gear
Wear protective gloves and eye protection when handling toilet components. This safeguards you from potential contact with bacteria and chemicals.
Ventilation
Ensure proper ventilation in the bathroom while working. Adequate ventilation helps disperse any fumes from cleaning agents and promotes a healthier work environment.
Step-by-Step Repair Process
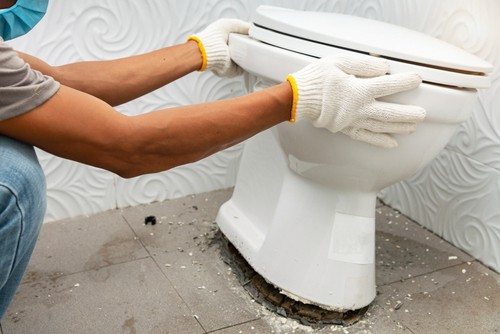
Removing the Toilet
Begin by safely disconnecting and removing the toilet from the floor. This step involves turning off the water supply, disconnecting the water line, and unbolting the toilet from the floor.
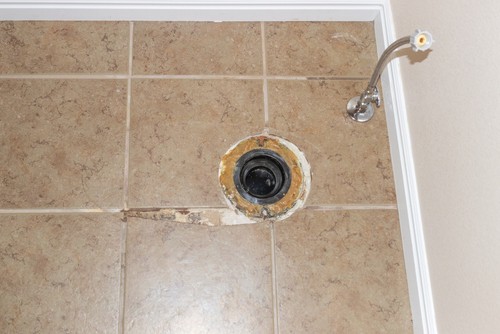
Cleaning the Area
Thoroughly clean the old wax residue from the toilet base and the flange (the pipe fitting on the floor). Inspect the flange for any damage or cracks.
Replacing the Wax Ring
Install a new wax ring by placing it on the flange, ensuring it is properly aligned with the toilet’s base. The wax ring creates a waterproof seal between the toilet and the floor.
Reattaching the Toilet
Carefully reattach the toilet to the floor by aligning it with the bolts and gently pressing it down onto the wax ring. Tighten the bolts evenly to secure the toilet in place.
Sealing with Plumber’s Putty
Apply the plumber’s putty around the toilet’s base to create an additional seal. This putty ensures a watertight connection between the toilet and the floor.
Testing for Leaks
Turn on the water supply and allow the tank to fill. Flush the toilet and closely observe the base for any signs of leakage. Ensure there are no water drips or puddles forming.
When to Seek Professional Help

Extensive Damage
If the floor or subfloor has sustained significant damage due to the leak, it’s advisable to seek professional assistance. Extensive repairs may be required.
Repeated Leaks
If leaks continue to occur despite DIY repairs, there may be underlying issues with your plumbing or toilet. Professional evaluation is necessary to identify and address these problems.
Old Plumbing
It’s wise to consult a professional in homes with older plumbing systems. They can assess the overall condition of your plumbing and recommend necessary upgrades or repairs.
Preventive Measures
Regular Inspections
Perform routine checks for signs of leakage around the toilet base. Early detection can prevent extensive damage and costly repairs.
Proper Installation
Ensure that your toilet is initially installed correctly with a new wax ring. Proper installation significantly reduces the likelihood of future leaks.
Careful Cleaning
Avoid using harsh chemicals or abrasive cleaning methods around the toilet base. These can damage the wax ring and compromise the seal.
Repairing a Leaking Toilet Base – Conclusion
In conclusion, a leaking toilet base is a common issue that, if left unaddressed, can lead to water damage, health concerns, and increased expenses.
With the knowledge provided in this guide, you can confidently diagnose, repair, and prevent leaks at the toilet base.
Following the step-by-step repair process, using the necessary tools and materials, and taking safety precautions, you can safeguard your bathroom from water damage and associated issues.
Empower yourself with this comprehensive information to maintain a leak-free and functional toilet in your home.
Are you seeking professional and reliable plumbing services in Singapore? Contact us today!